Burda patterns are designed without seam allowances. It’s up to you to add them when cutting, 1.5 cm in general, and 2 cm for hems.
1. Where do I find the downloadable patterns once my purchase has been made?
As soon as your purchase has been made, you will receive a confirmation e-mail from burdastyle.fr at the e-mail address that you have provided. This e-mail contains an insert with the link to the patterns to be downloaded that you have just bought.
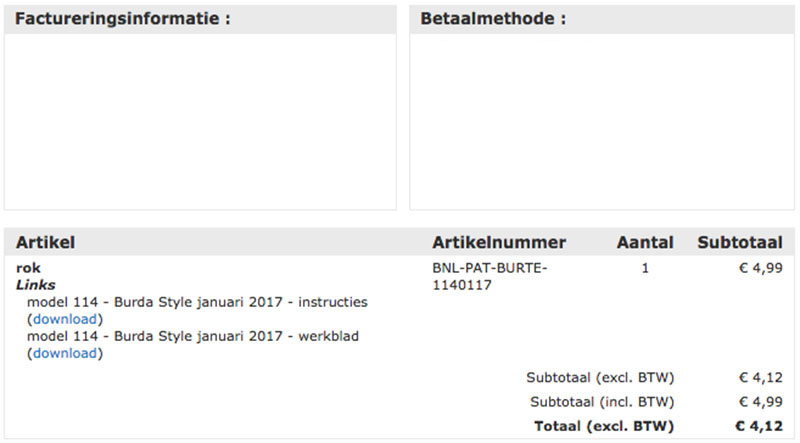
This is the e-mail that you will receive after your purchase
These patterns are accessible in the "my downloadable products" section in your customer account.
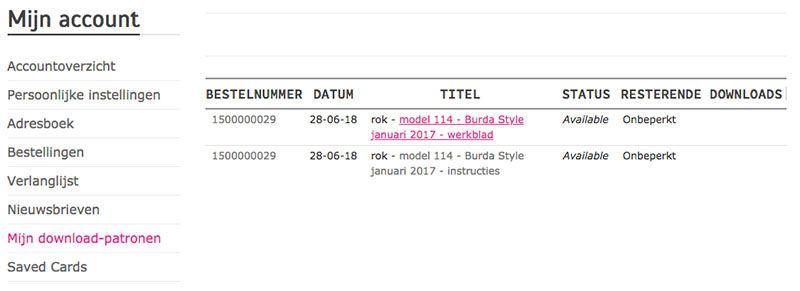
Click here, to see your purchase history, download your pattern and save your files on your computer (you can download your patterns as many times as you want).
2. How does the download work?
A. Preview
To open your PDF file, you must have the Adobe Reader software. If you do not have this software, you can download it for free on this website: get.adobe.com
Open your PDF. On the first page, you have access to the preview of the pages to be printed. The preview is displayed in small format, and you can see how the pattern is distributed on the pages.
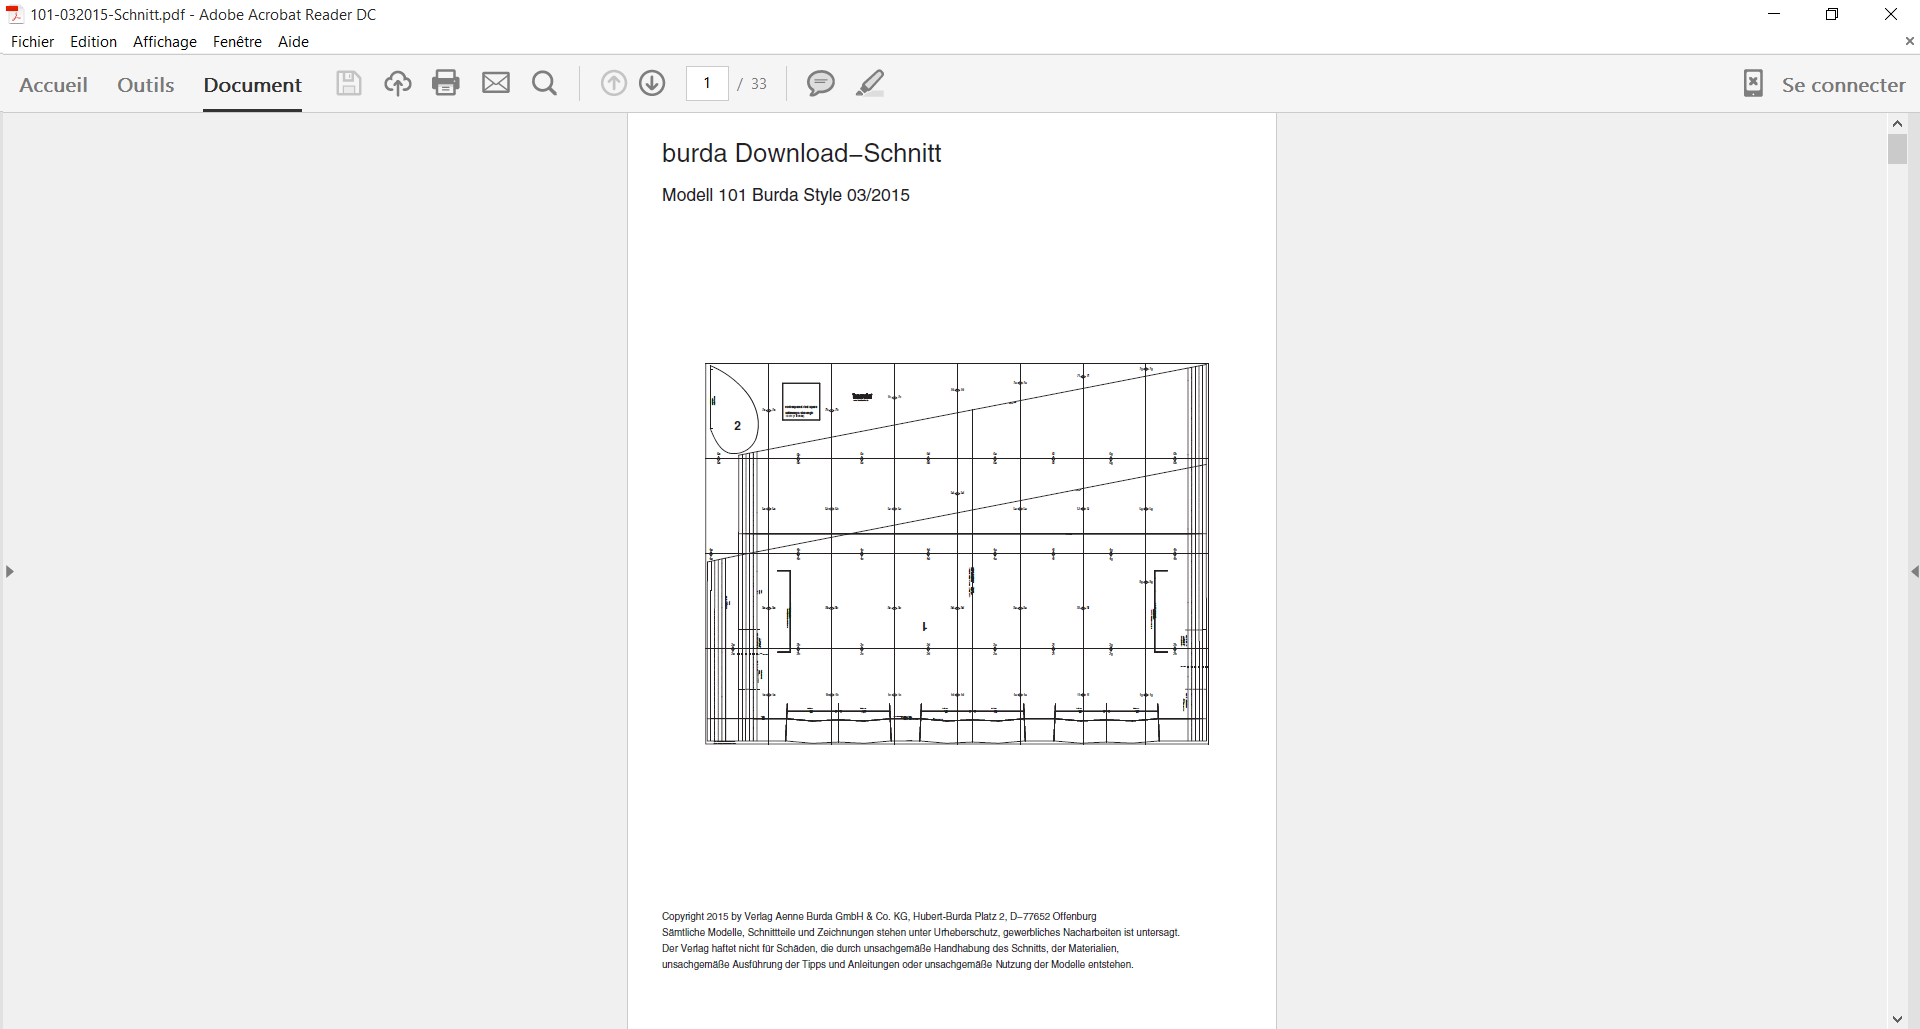
The global preview of your pattern.
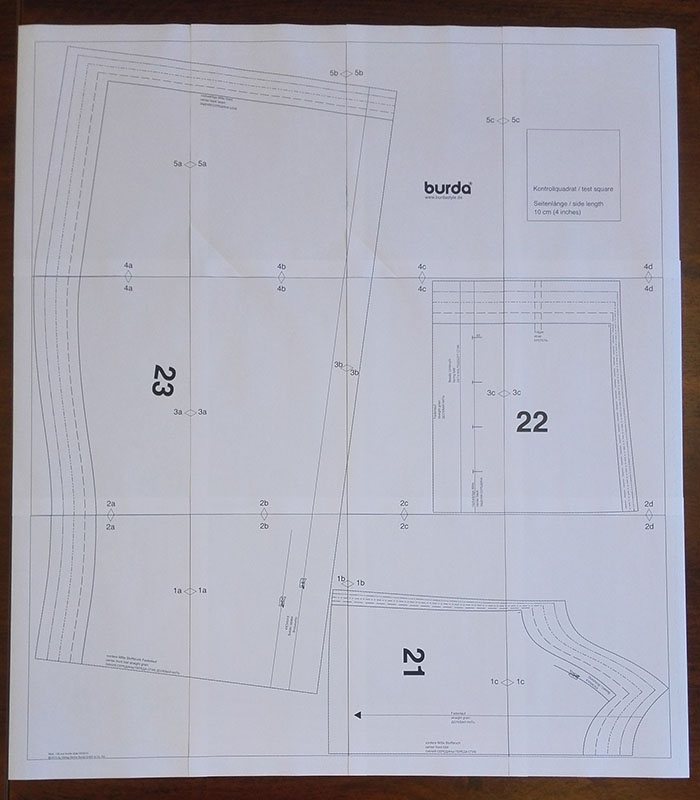
In this preview, find the page where the test square is located and then find the corresponding page in the PDF document.

The zoomed preview on the page containing the test square.
The pages are arranged in the order of the section numbers which allow you to assemble the pages.
This square allows you to check if your printer will print the pattern at the right size and without delay.
B. The test square (dowloading 101!)
To begin, print only the page with the test square by indicating the page number on which it is located in your print options, and then check with a ruler that the box is exactly 10 x 10 cm.
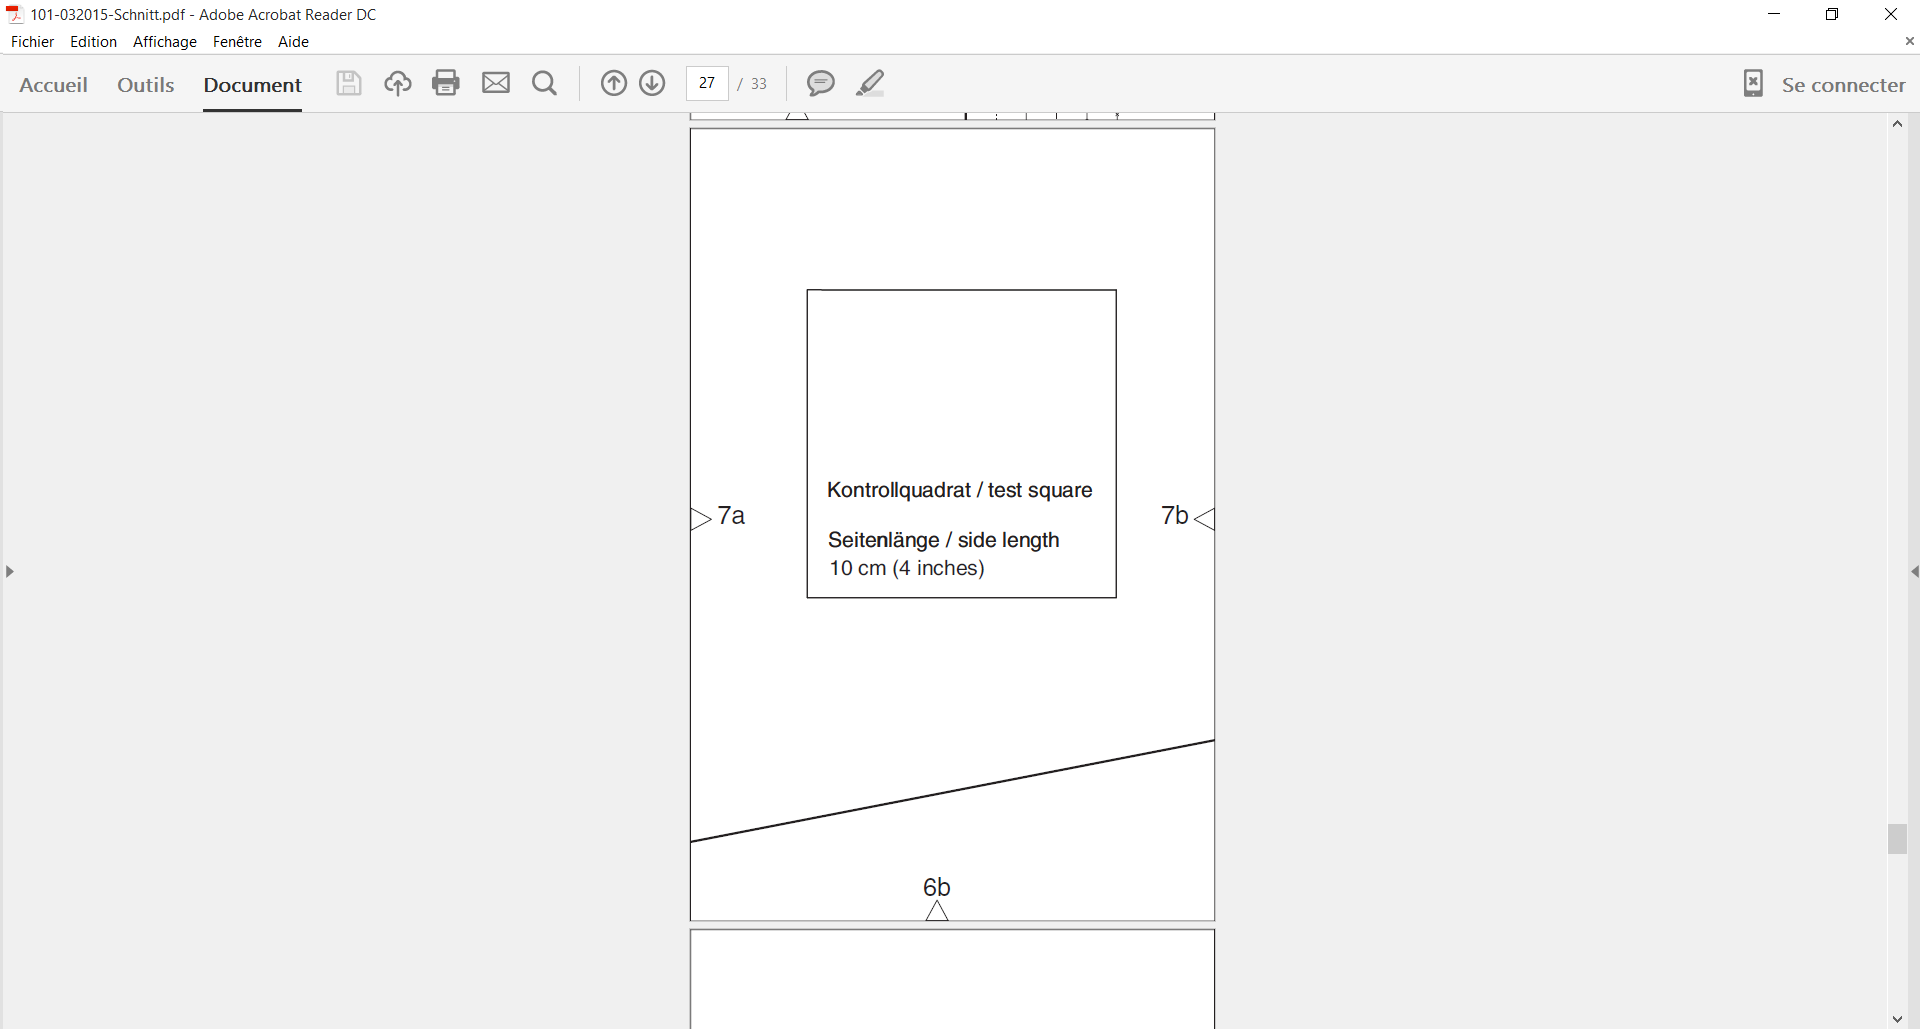
The page containing the test square
If the side length does not match, check your printer settings: the scale must be 100%. Disable the function that automatically adjusts according to the size of the sheet or print area.
On a Mac, it might be indicated that the page is too large for the print area when printing. In that case, you can click on "Reduce the image" or "Adjust". For the downloadable pattern, click on the "Adjust” button so that the scale remains at 100%.
Once the test square has been validated by the printer with 10 cm on the sides, you can print the entire pattern.
C. Cut and assembly
- Place the pattern pages in the correct order with the help of the preview page by identifying the section numbers: make sure that the markings in numbers and letters match.
- Next, cut the left side of the page so that a margin remains on the right for the pasted assembly (the pages can be cut or bent).
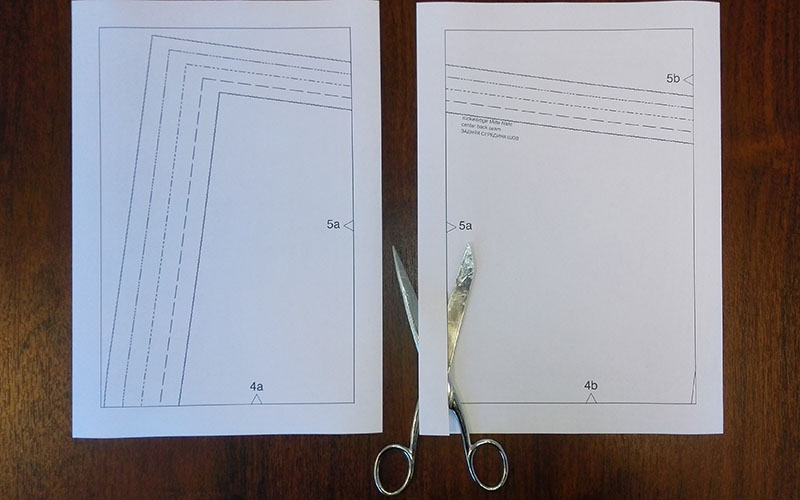
Prepare all the pages this way.
The correctly cut pages can now be assembled and pasted row by row.
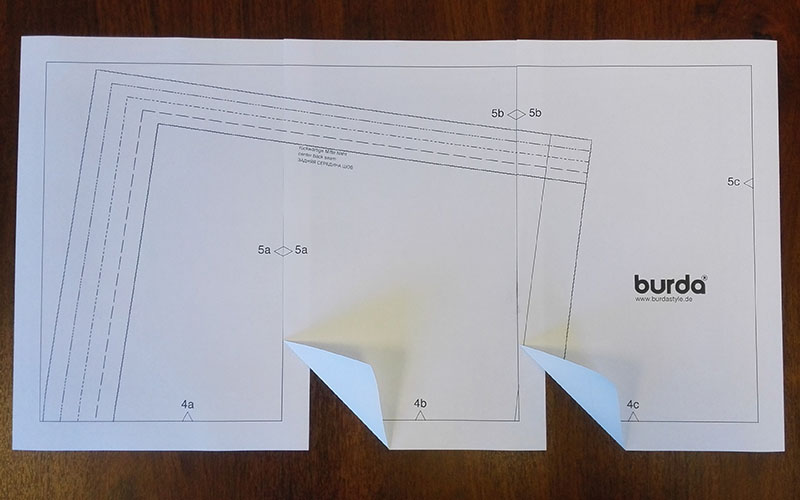
Paste the pages row by row.
To finish assembling the rows from the second row and all the following rows, you can also cut the margin at the top edge, so that the lower edge can always be pasted to the next upper edge etc.
Assemble the rows.
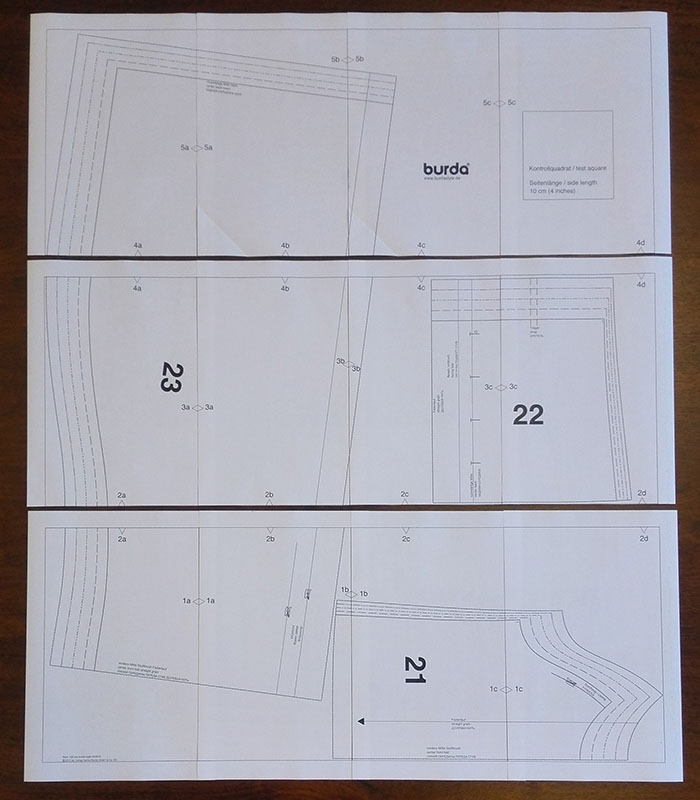
Your pattern is ready! If it is a multiple-sized pattern, choose your size or your sizes and cut the pattern pieces along the marked lines. If it is a single-sized pattern, there is only one single line, so you can cut it out immediately.